RabbitMQ is one of the most popular open-source message brokers in use today. Knowingly, unknowingly you would be using RabiitMQ under the hood of many applications that you use daily. In this beginner-friendly post, you will learn how to use RabbitMQ with Docker and Docker Compose, let’s get started!
Table of contents #
- What is RabbitMQ
- Why use RabbitMQ
- Popularity of RabbitMQ
- Run RabbitMQ with Docker
- Make running RabbitMQ easier with Docker Compose
- Conclusion
What is RabbitMQ #
RabbitMQ is a message broker software that acts as a middleman for different parts of your application. It helps you send and receive messages between different parts of your application reliably and efficiently. RabbitMQ is open source and based on the Advanced Message Queuing Protocol (AMQP). The queue part is first in first out (FIFO), where the order of the incoming messages is maintained. The official definition of RabbitMQ is:
RabbitMQ is a reliable and mature messaging and streaming broker, which is easy to deploy on cloud environments, on-premises, and on your local machine. It is currently used by millions worldwide.
Think of RabbitMQ as a post office for your application. When one part of your application wants to send a message to another part, it sends the message to RabbitMQ. RabbitMQ then stores the message and delivers it to the correct recipient.
Why use RabbitMQ #
RabbitMQ is useful for a variety of tasks, including:
- Asynchronous processing: RabbitMQ can be used to offload tasks that don't need to be done immediately, such as sending emails or processing images. This can help to improve the performance and responsiveness of your application.
- Microservices communication: RabbitMQ can be used to facilitate communication between different microservices in a microservices architecture. This can help to decouple your microservices and make them more independent.
- Task queues: RabbitMQ can be used to create task queues, which are used to distribute tasks among multiple workers. This can help to improve the scalability and reliability of your application.
RabbitMQ is particularly useful in a microservices environment. Microservices are a software architecture style that structures an application as a collection of loosely coupled services. RabbitMQ can be used to facilitate communication between these services, allowing them to be independently developed, deployed, and scaled.
Popularity of RabbitMQ #
RabbitMQ is one of the most popular message brokers available. It is used by a wide variety of organizations, including small startups and large enterprises. RabbitMQ is a popular choice due to its reliability, scalability, and ease of use.
In terms of popularity, RabbitMQ is more popular than ZeroMQ, ActiveMQ, and RocketMQ. However, Kafka is more popular than RabbitMQ as per Google Trends data. This can be seen in the graph below:
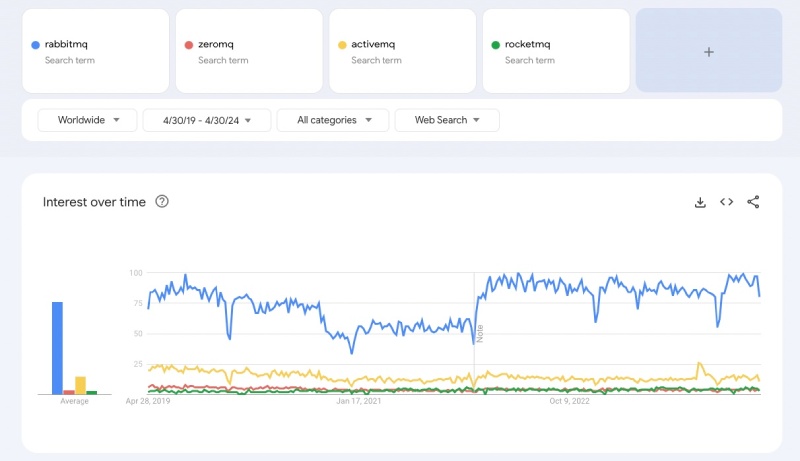
Kafka's popularity might be due to its ability to handle high-throughput data streams and its use in big data applications. Still, RabbitMQ is a great choice for most use cases, especially for smaller applications and microservices.
You can also get managed RabbitMQ from Cloud AMQP or VMware Tanzu RabbitMQ.
Run RabbitMQ with Docker #
Docker is a containerization platform that allows you to package your applications and their dependencies into containers. Containers are isolated environments that can be run on any system that has Docker installed. This makes it easy to deploy and run your applications consistently and reliably.
To run RabbitMQ with Docker, you can use the official RabbitMQ Docker image. The image is available in several different flavors, including a basic image, an image with the management plugin, and an image with the shovel plugin.
The management plugin provides a web-based user interface for managing your RabbitMQ server. The shovel plugin can be used to move messages between different RabbitMQ servers or clusters.
To run RabbitMQ with the management plugin, you can use the following command:
docker run --hostname rabbitmq --name rabbit-mq -p 15672:15672 -p 5672:5672 rabbitmq:3-managementThis command will start a RabbitMQ container in detached mode (-d) with the hostname rabbitmq and the name rabbit-mq. It will also map the container's ports 15672 and 5672 to the host's ports 15672 and 5672, respectively. Port 15672 is used for the management plugin, and port 5672 is used for the AMQP protocol.
When you run it, it will give an output like the below:
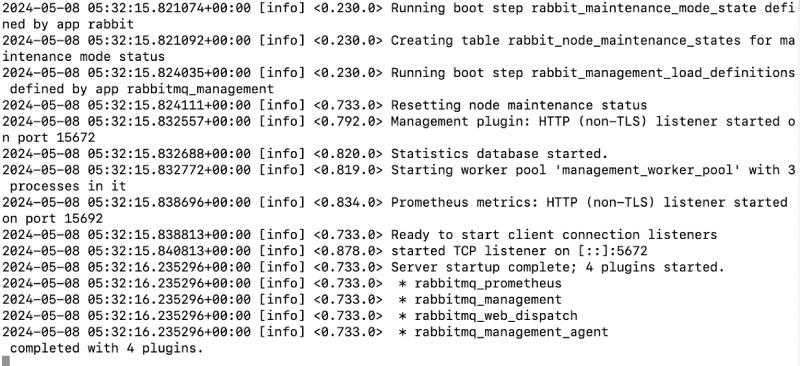
You can also run the container with a -d parameter to detach the output. As no volumes are attached the messages will be deleted when the container restarts.
Once the container is running, you can access the management plugin by visiting http://localhost:15672 in your web browser. The default username and password are both guest as seen below:
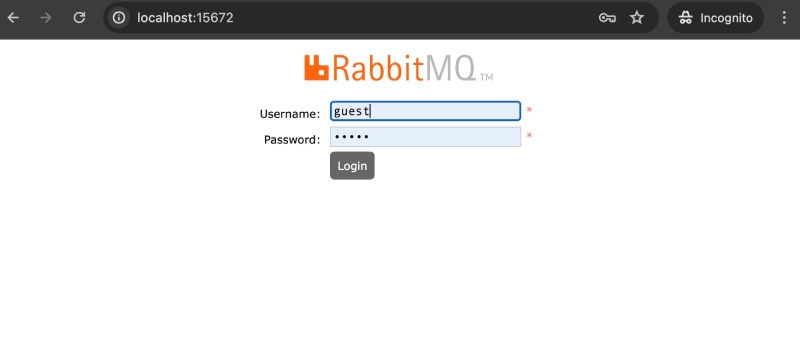
After you log in, you can see a dashboard as follows:
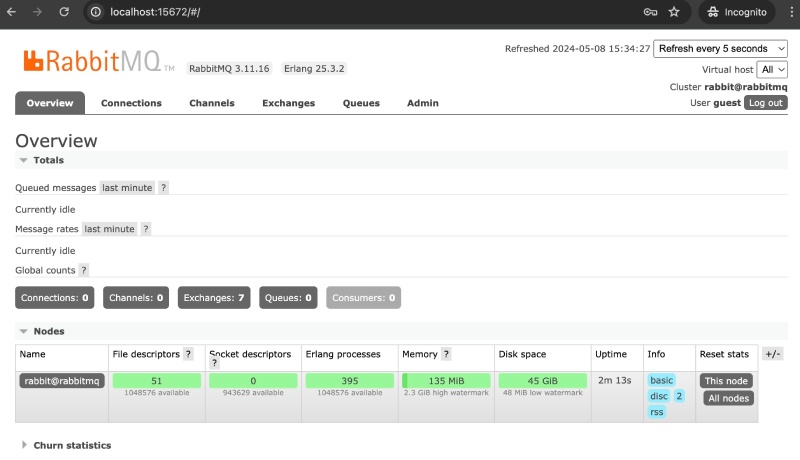
Next, you will learn how to run Rabbit MQ with docker-compose.
Make running RabbitMQ easier with Docker Compose #
Docker Compose is a tool for defining and running multi-container Docker applications. It allows you to define your application's services in a YAML file and then start and stop all of the services with a single command.
To run RabbitMQ with Docker Compose, you can create a docker-compose.yml file with the following contents:
version: "3.9"
services:
  rabbitmq:
    image: rabbitmq:3-management
    container_name: rabbitmq
    ports:
      - 5672:5672
      - 15672:15672
    volumes:
      - rabbitmq_data:/var/lib/rabbitmq
volumes:
  rabbitmq_data:
This docker-compose.yml file defines a service called rabbitmq that uses the rabbitmq:3-management image. It also maps the container's ports 5672 and 15672 to the host's ports 5672 and 15672, respectively. Finally, it creates a volume called rabbitmq_data that is used to persist the RabbitMQ data.
To start RabbitMQ with Docker Compose, you can run the following command:
docker compose up
This command will start the RabbitMQ container. You can run it in detached mode with docker compose up -d if you like. It will give the following output if everything is fine:
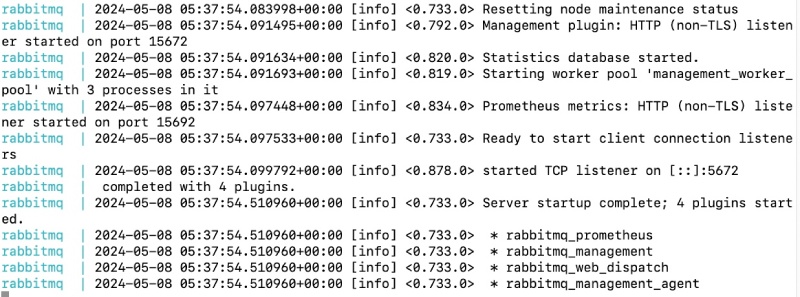
Once the container is running, you can access the management plugin by visiting http://localhost:15672 in your web browser sane as running it with docker run. If you are looking for a comprehensive producer and consumer example, please read this post on RabiitMQ and Node.js with Docker and Docker compose.
Conclusion #
RabbitMQ is a powerful and versatile message broker that can be used for a variety of tasks. Running RabbitMQ with Docker and Docker Compose makes it easy to deploy and manage your RabbitMQ server.
I hope this guide has helped you get started with RabbitMQ and Docker. If you have any questions, please feel free to leave a comment below.