Gen AI can be utilized to build useful things. In this post, you will build an e-commerce product description generator using Google’s Gemini Pro vision LLM over Vertex AI on the Google Cloud Platform (GCP). Let’s get started!
Table of contents #
- Process of writing product descriptions for e-commerce websites
- Prerequisites
- Vertex AI on GCP
- Prompting
- Name and save the prompt
- Gemini configurations
- Run generated Python Code
- What's next
- Conclusion
Process of writing product descriptions for e-commerce websites #
Before you get your hands dirty with Vertex AI and some code, let’s understand the process of wiring product descriptions for any product shown on an e-commerce website. Models are scheduled to take photographs wearing the products, every product is photographed in a photo studio.
Then a copywriter has a look at the retouched photographs possibly with the product by the side and writes a product description that you see on the website. It is a long process and if the website has hundreds of products going online each day it can be a labor-intensive, time-consuming, and error-prone process as it is mostly manual. It can be summed up visually as:
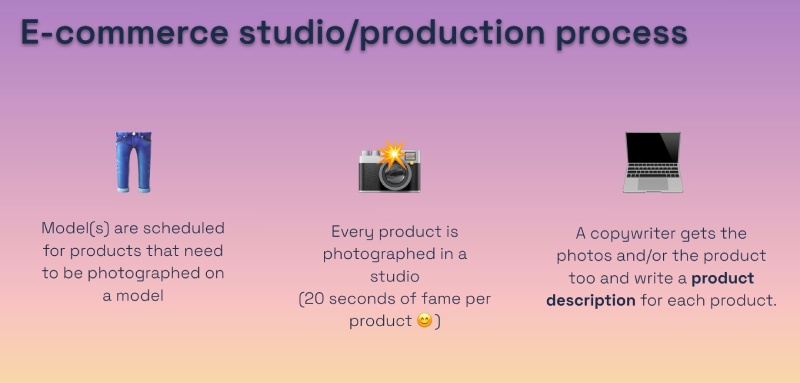
Now, imagine you have a system where you can upload pictures and prompt the system to get the product description for that particular product. The generated product descriptions will not be perfect but it will get you (or the copywriter) 80% of the way. That is what you are doing to build in this tutorial.
To do this you will use the Gemini Pro LLM over Vertex AI, you will also get the basic code that can be deployed as a service. You can find some more context in these slides. In the next section, you will learn about the prerequisites to build the e-commerce product description generator.
Prerequisites #
To begin, you will need to have the following pre-requisites sorted:
- Have a working Google Cloud account (with some credit)
- Download this zip file on your machine, for the product images. Please decompress it after downloading.
Also, be aware of the Vertex AI and Gemini Pricing as well.
Next, you will create a GCP project to build your e-commerce product description generator. You might need 20-30 minutes to create the basic product description generator and have a proof of concept code for it as shown below.
Vertex AI on GCP #
Below are the steps to create a new GCP project (if you have an existing one you can use that too).
- Go to your Google Cloud Console and Create a new project called
gemini-ecommor anything relevant as seen below:
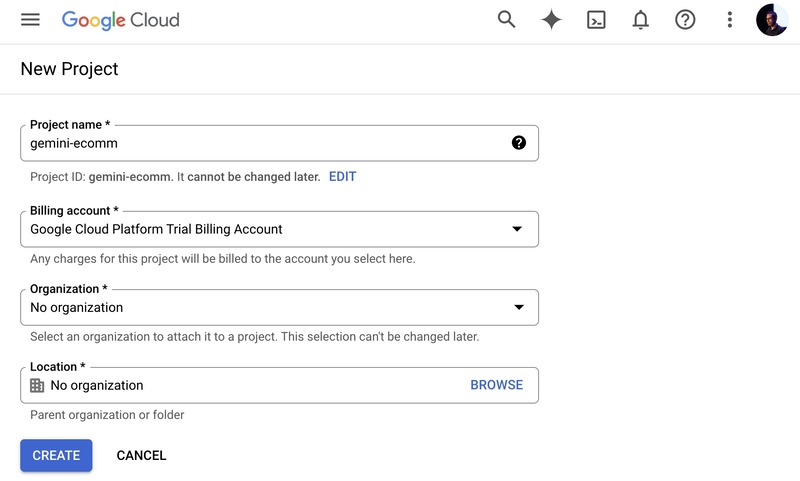
Make sure you have selected the project created in Step 1 if you have multiple projects.
Go to Vertex AI from your Google Cloud Console, the easiest way to do it would be to search for
vertexon the search bar as seen below:
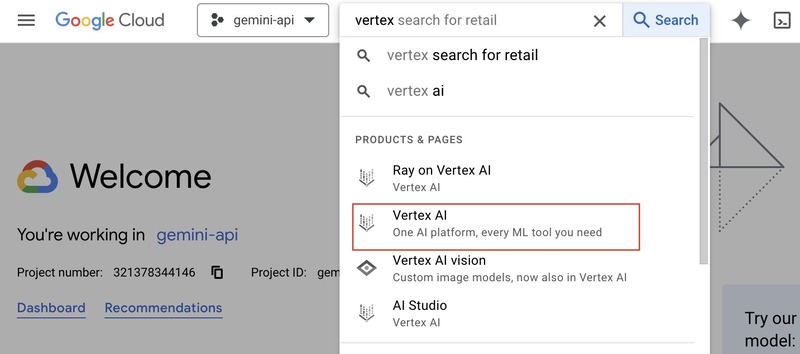
Click on
Vertex AIOn the Vertex AI page, then "Enable all recommended APIs" as seen below (it will take some time):
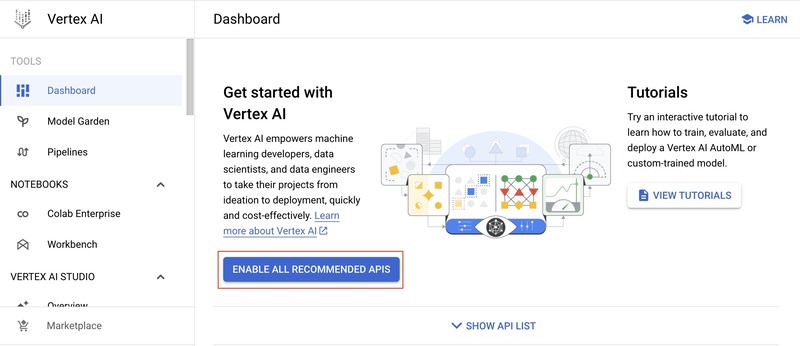
- After the APIs are enabled, click on
Multimodalfound on the left menu
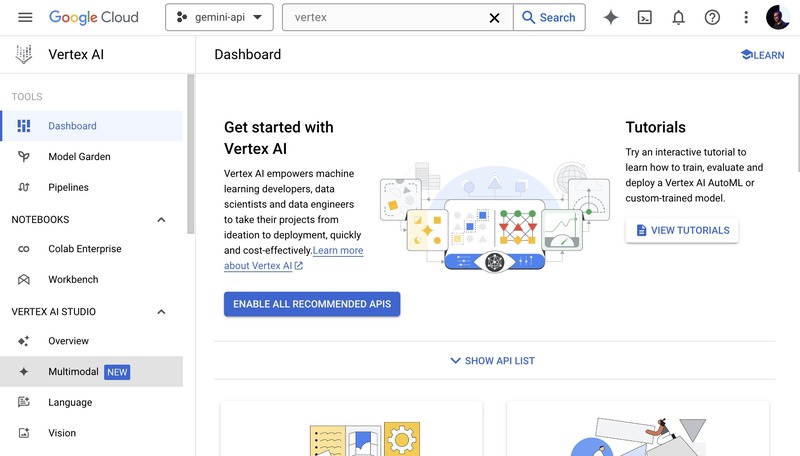
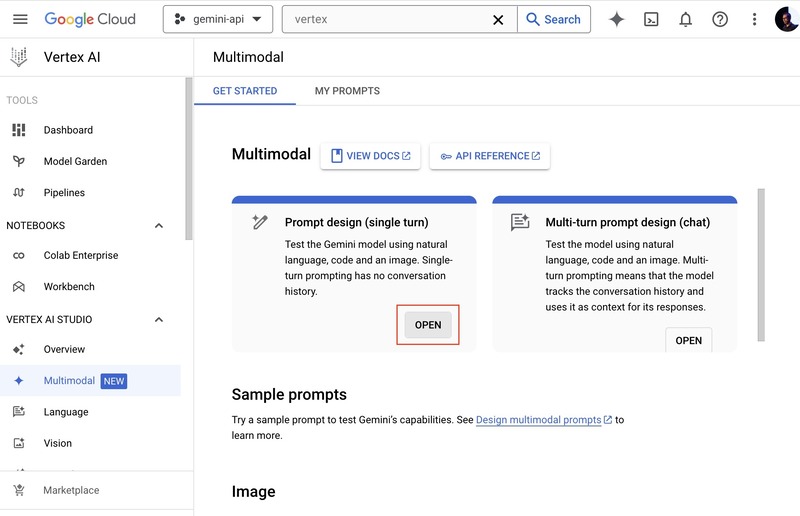
- On the Multimodal page, click
Openon the "Prompt design (single turn)" box as follows:
Prompting #
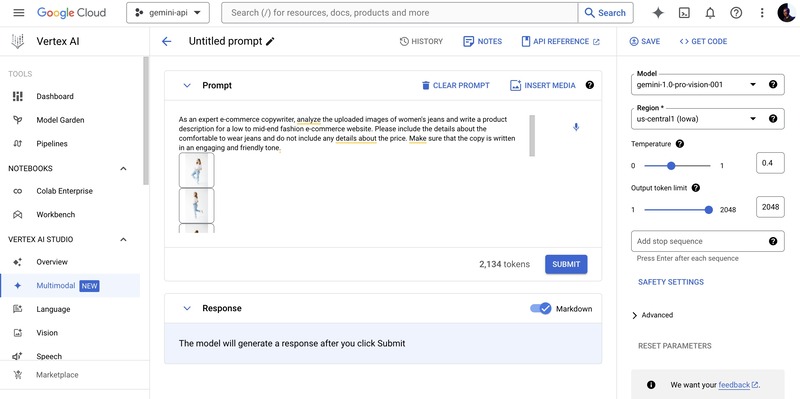
- On the Prompt experiment page, please make sure you have the
gemini-1.0-pro-vision-001model selected. Then, paste the following prompt in thePrompttext box:
As an expert e-commerce copywriter, analyze the uploaded images of
women's jeans and write a product description for a low to mid-end
fashion e-commerce website. Please include the details about the
comfortable to wear jeans and do not include any details about the
price. Make sure that the copy is written in an engaging and friendly tone.
- Then upload the images you find in the repository or the images folder of the unzipped
images.zipfile. Navigate towomens-jeans-photosfolder after clicking theInsert Mediaoption on the right side of thePrompttextbox. Then upload all Once all the 8 images, it will look something like the below:
- After that hit the
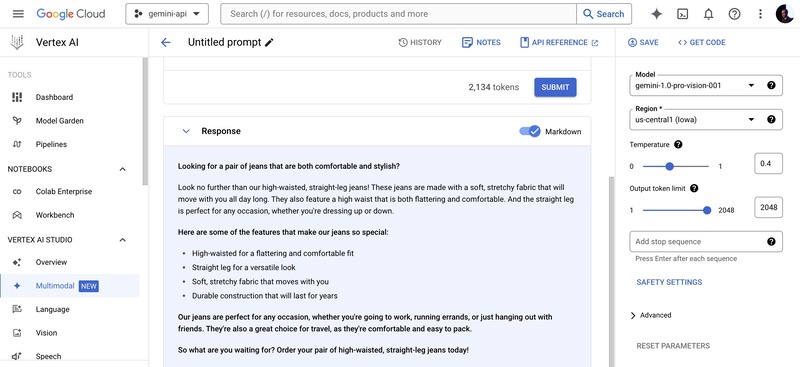
Submitbutton to test out the prompt with the uploaded images, you should get a response similar to the following:
Name and save the prompt #
- At this point, it would be a good idea to save your prompt (with images). To do this, click the
penicon besideUntitled promptabove the prompt text box, then typee-commerce-product-desc-generatorthe click anywhere, it will look like the below while editing:

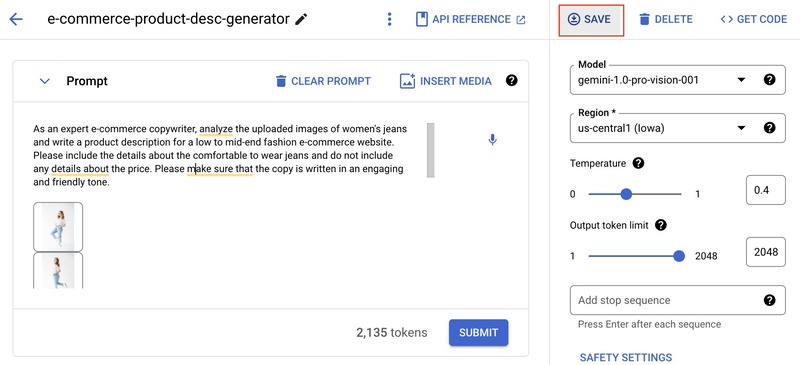
- As you have named the prompt, you can save it. To save the prompt click
Saveon the top left part of the right sidebar as shown below:
- Then, select the region (it is ok to choose us-central1) on the overlay window and save the prompt.
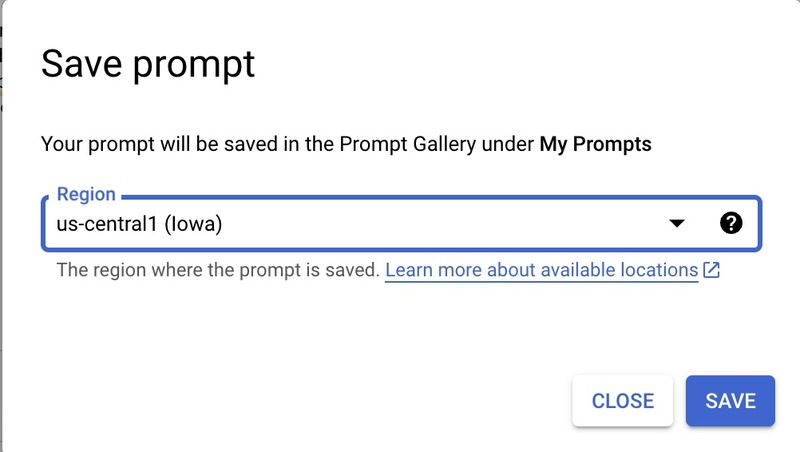
All saved prompts will be accessible in your My Prompts page.

- Hurray! The basic e-commerce product description generator is working. Now, you will change some settings to make it better. You can go back to the prompt editing page by clicking the
Prompt Nameif you are on theMy Promptspage.
Gemini configurations #
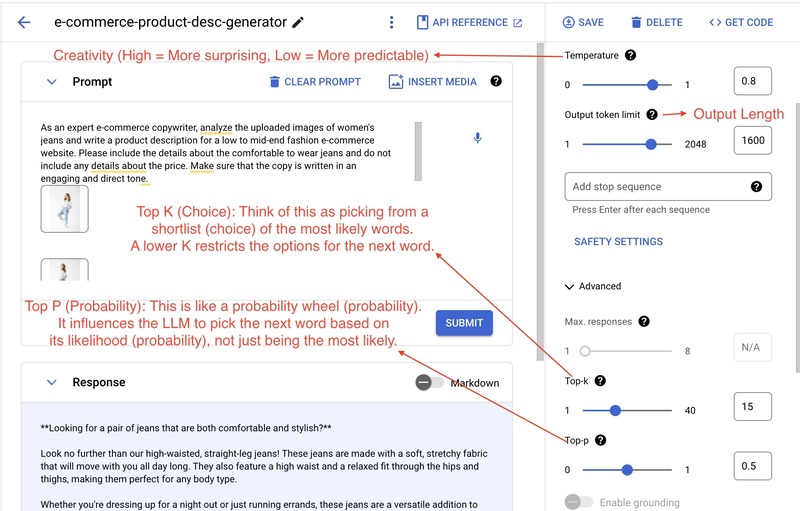
- In terms of configurations, for Gemini 1.0 pro vision there are 4 options you can configure. Those four are explained in plain words below:
Temperature (Randomness/Creativity/Spice): Imagine a roulette wheel (randomness). A high temperature increases the spin's randomness, affecting the chosen word (output).
Output Token Limit (Length): This is like a set word limit (length) for your text. It controls how many words the LLM generates in total.
Top K (Choice): Think of this as picking from a shortlist (choice) of the most likely words. A lower K restricts the options for the next word.
Top P (Probability): This is like a probability wheel (probability). It influences the LLM to pick the next word based on its likelihood (probability), not just being the most likely.
Below is a configuration you can try out, the right settings for this configuration depend on how you want the output to be shaped by Gemini:
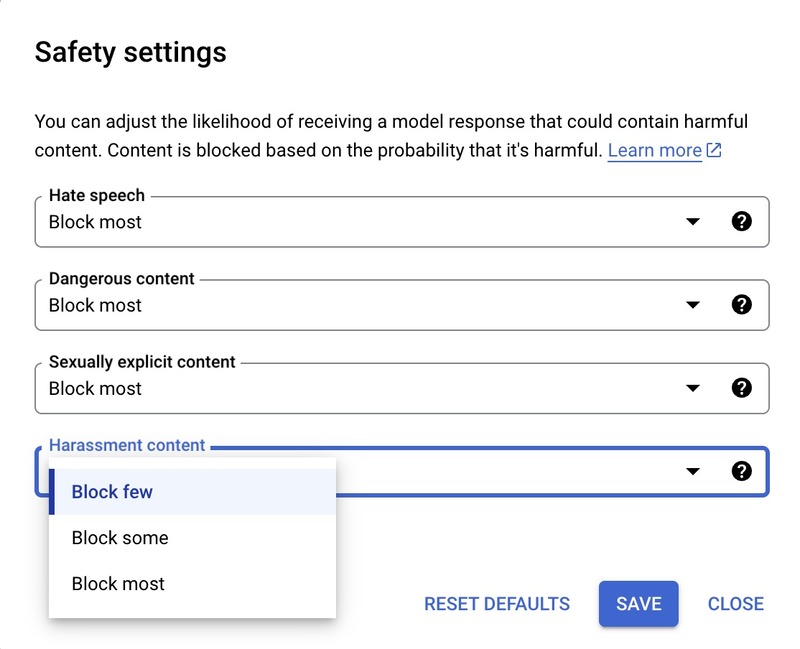
- It is also important to set up the
Safety Settingscorrectly as per your use case, for now, we will set it at maximum safety (Responsible AI). As seen below, the safety settings (found on the right sidebar are self-explanatory)
- You can also tweak the prompt text to make it better, below is another version of the prompt:
As an expert e-commerce copywriter, analyze the uploaded images of women's
jeans and write a product description for a low to mid-end fashion e-commerce
website. Please include the details about the comfortable to wear clothing and
do not include any details about the price. Make sure that the copy is written
in an engaging and direct tone.
You can play around with the prompt and make it more flexible or more specific as per your goals.
The next step will involve some code.
Run generated Python Code #
- If you want to create an API for the e-commerce description generator or want to have more control over what the LLM is called, you can generate code and run it on a Google Cloud Platform service like Google Cloud Run. To generate code, click the
<> Get Codelink which shows a slider on the right side as follows:
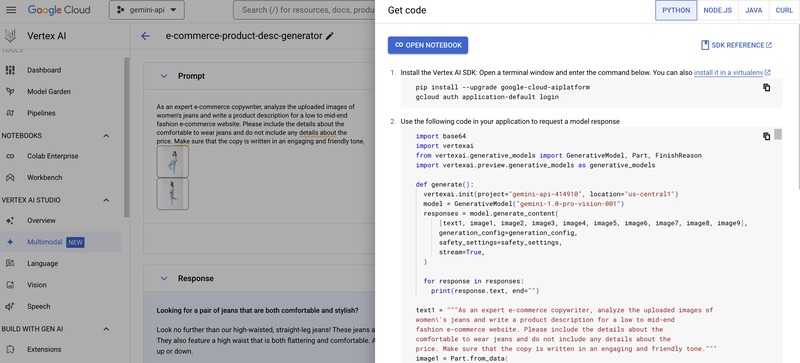
For this workshop, you will use the Node.js code and try it out. For that, you will use Cloud Shell and Cloud Shell Editor.
- Click
Activate Cloud Shelltoward the top right corner of the screen as seen below:

- In the Cloud shell window, click
Open Editor:

- This will take some time and open up the Google Cloud Shell Editor which looks very similar to VS Code. In the Editor click
Hamburger Menu > Terminal > New Terminalas follows:
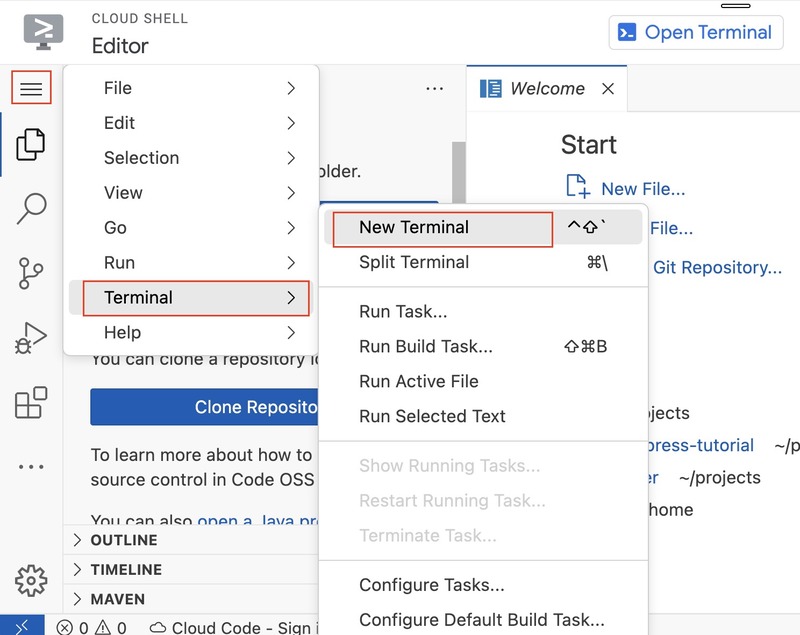
- In the editor's terminal, execute
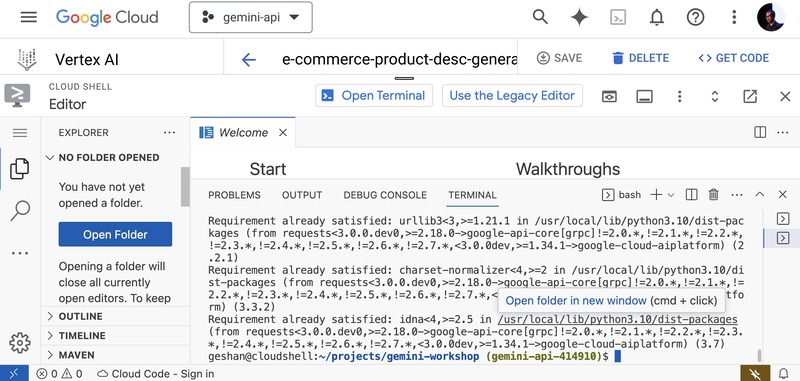
mkdir projects && cd projects && mkdir gemini-workshop && cd gemini-workshopand thenpip3 install --upgrade google-cloud-aiplatform:
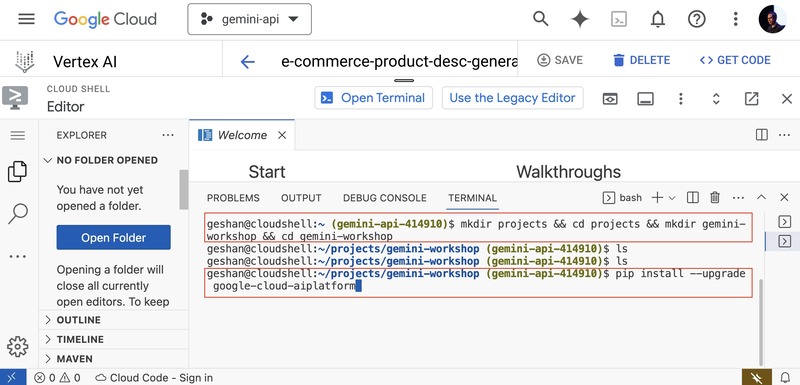
- After the vertex AI Python package is installed it will look like the below:
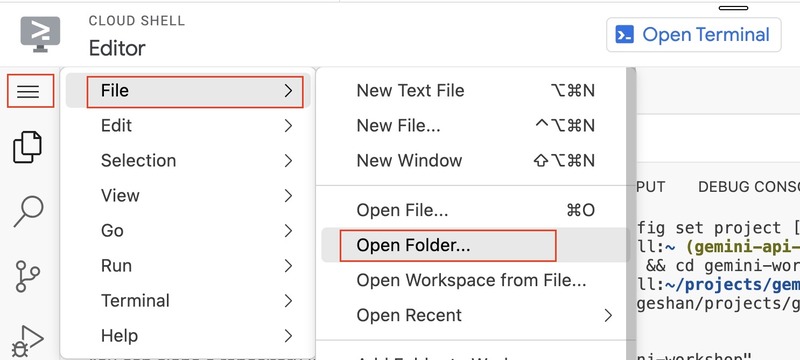
- After that you will load the folder in the project, go to
Hamburger Menu > File > Open Folder:
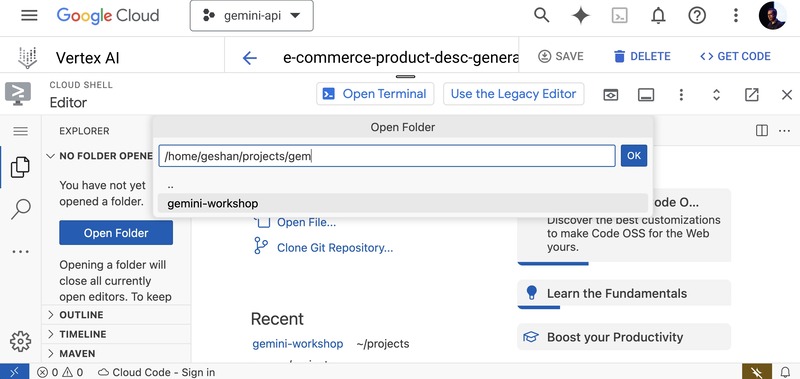
- Then type in
projects/gemand select thegemini-workshopoption and clickOK:
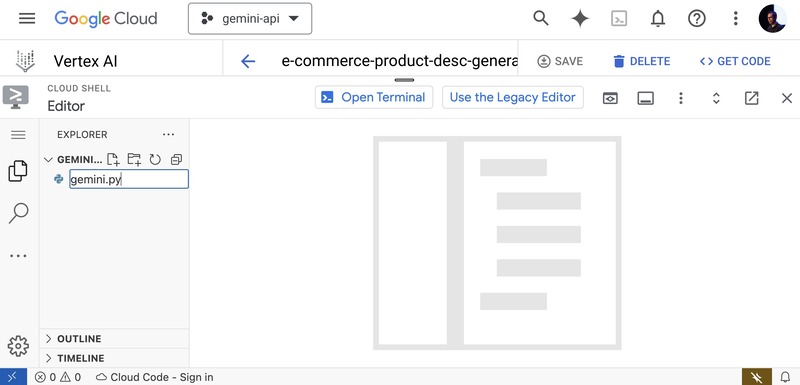
- It will load the folder on the Cloud Shell editor, after that, to add a new file click the
file+icon besideGEMINI-WORKSHOPand name itgemini.py
- For the contents of the gemini.py, click
<>GET CODEon the Vertex AI Editor screen, while on thePythonoption copy the code into a file calledgemini.py
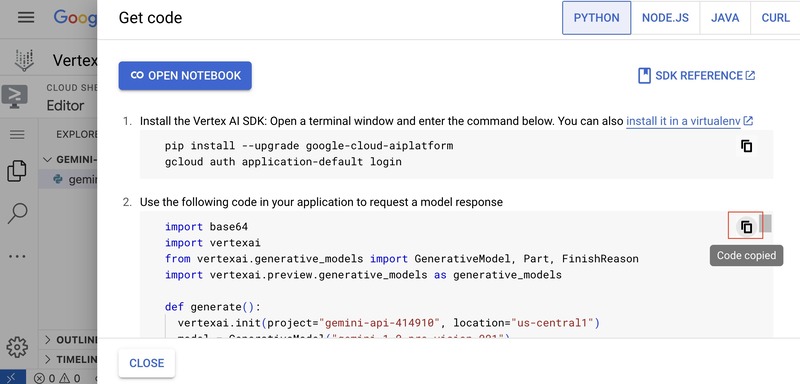
- Paste the code in the
gemini.pyempty file and save it:
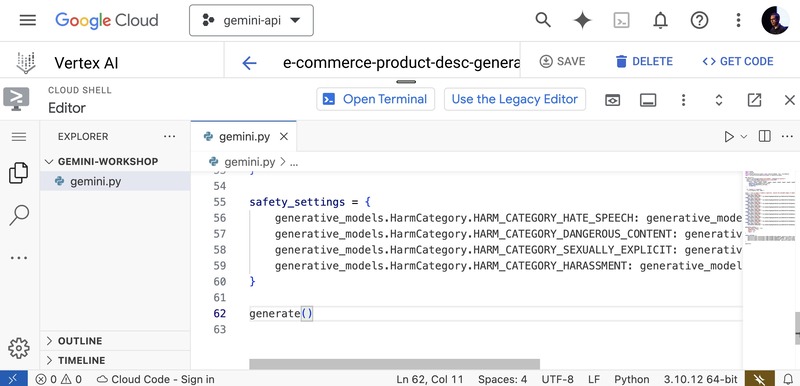
- To run the code and test it out, again open the terminal from
Hamburger Menu > Terminal > New Terminaland type inpython gemini.pythen hit enter. It will ask you toAuthorise:
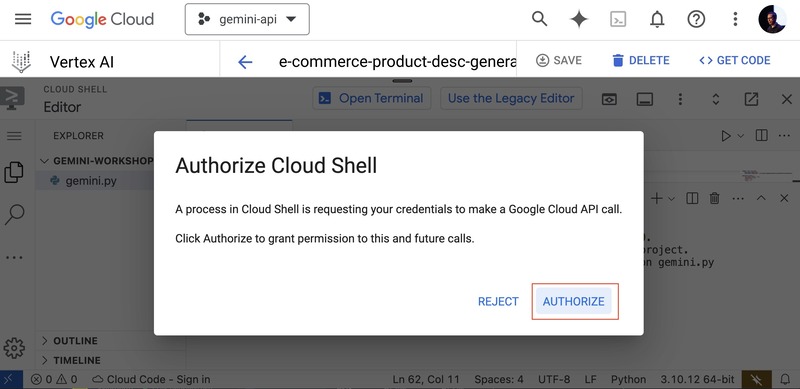
After authorisation, the code will run and give an output like the below:
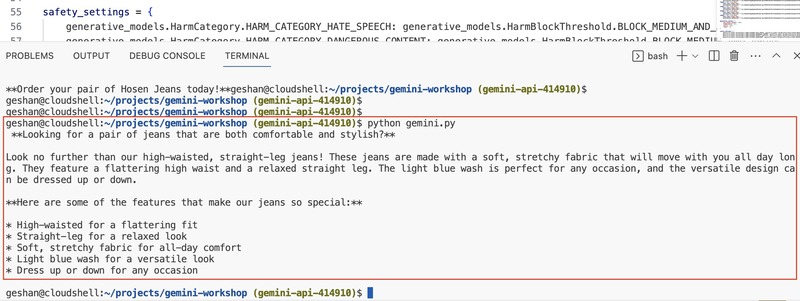
Congrats! You are a Gemini and Vertex AI novice now :). You can close the Cloud Shell Editor. Even shut down/delete the project if you like.
What's next #
- Further steps
The generated code is more like a proof of concept. You can add an API layer and UI on top of it to make it more useful. You can deploy that API on Google Cloud Run as serverless containers.
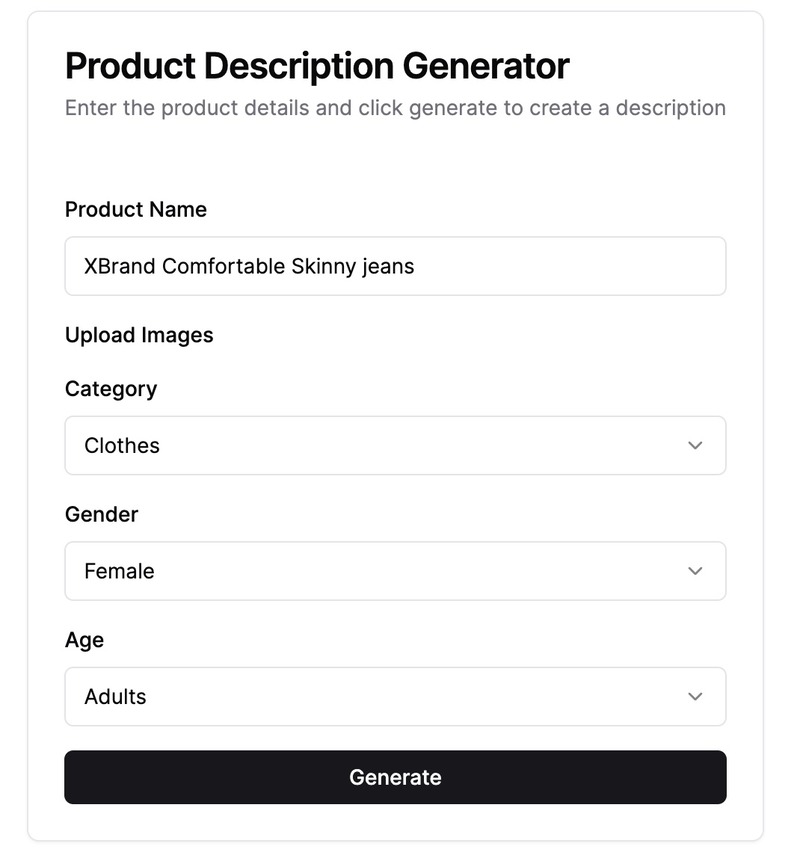
For instance below is a basic UI generated with v0 with the prompt:
An internal tool for e-commerce websites to generate product descriptions,
it will have a product name text box, multi-file upload field, category
select box with clothes, shoes, accessory options, gender select box
with male, female, and unisex options and age select box with infants,
kids, teens, and adults options. Then a button that says Generate.
The UI is below:
- It would be good idea to read more about LLMs in general and also about Gemini. You can also do courses or code labs about Gemini on Cloud Skills boost platform.
Congrats! You have successfully built and tested a general purpose e-commrece product description generator. You can also crate a text or URL's text summarizer using Gemini over Vertex AI.
Conclusion #
In this blog post, you embarked on a journey to build a basic e-commerce product description generator using Google's Gemini API over Vertex AI on GCP.
You started by creating a prompt that captures the essence of what we wanted the generator to achieve. Towards the end you create a proof of concept script with Python that can be converted into a standalone internal application.
Whether you're an e-commerce entrepreneur, a content creator, or simply someone interested in the future of AI, LLMs have the potential to revolutionize the way we work and create.
So, embrace the excitement, experiment with different prompts and configurations, and see what amazing results you can achieve with the help of Google's Gemini API.
The future of better productivity is here, and it's powered by AI!